はじめに
REST-API を作ってみるシリーズ第二弾。Node.js と Python と SpringBoot を基礎だけ勉強したい。
ということで、Node.js + Express + TypeScript で基本的な API を作ってみます。
基本は Node.js + Express と同じです。ただし、Node.js 開発には TypeScript を使うことが多いようなので、TypeScript で作り直してみます。
TypeScript・webpack の理解がメインになってしまいました。
前提
- 実行環境:WSL2 Linux(ubuntu)
- Node.js がインストールされている(参考:Node.jsのインストール方法メモ | エンジニアを目指す日常ブログ)
プロジェクト作成
初期設定
GitHub でプロジェクトを作成する。今回は「restful-api-node-ts」とした。
.gitignoreを「Node」に適した設定で生成してから、ローカルにcloneする。
$ git clone git@github.com:{githubユーザ名}/restful-api-node-ts.git
$ cd restful-api-node-ts
Node.js のプロジェクトを作成する。
$ npm init -y上記コマンドで、package.jsonが生成される。
TypeScript の準備
TypeScript 用モジュールをインストールする。
$ npm install typescript --save-dev
$ npm install @types/node --save-dev
$ npm install ts-node --save-devtsconfig.jsonファイルを作成する。
$ npx tsc --init

Created a new tsconfig.json with: TS
  target: es2016
  module: commonjs
  strict: true
  esModuleInterop: true
  skipLibCheck: true
  forceConsistentCasingInFileNames: true


You can learn more at https://aka.ms/tsconfigmoduleはES2015に書き換えておく。
Node.js では 通常、CommonJS しか使えないが、ES2015形式をCommonJS形式に変換する仕事は 、TypeScriptのビルドではなくwebpack 側に任せるとよいらしい。
{
  "compilerOptions": {
    "target": "ES2015",                                  /* Set the JavaScript language version for emitted JavaScript and include compatible library declarations. */
    "module": "ES2015",                                /* Specify what module code is generated. */
    "allowSyntheticDefaultImports": true,             /* Allow 'import x from y' when a module doesn't have a default export. */
    "esModuleInterop": true,                             /* Emit additional JavaScript to ease support for importing CommonJS modules. This enables 'allowSyntheticDefaultImports' for type compatibility. */
    "forceConsistentCasingInFileNames": true,            /* Ensure that casing is correct in imports. */
    "strict": true,                                      /* Enable all strict type-checking options. */
    "skipLibCheck": true                                 /* Skip type checking all .d.ts files. */
  },
}補足:tsc --initコマンドの前にnpxを付ける理由
typescriptモジュールは-gコマンドをつけずに、プロジェクト内にインストールした。
通常、グローバルインストールをしなかったモジュールのコマンドは、ターミナルで使用することはできない。しかし、npxを使うと、「グローバルにインストールせずに」コマンドを使うことができる。(参考:npx | npm ドキュメント)
また、package.jsonの中ではコマンドを使用可能。以下のように定義すれば、npm run initでtscコマンドを実行できる。
{
  "scripts": {
    "init": "tsc --init"
  },
  // 省略
}
ESlint 設定
コードチェック用にESlintをインストールし、.eslintrc.jsonファイルを生成する。
$ npm install eslint @typescript-eslint/parser @typescript-eslint/eslint-plugin --save-dev
$ npm init @eslint/config
設定内容は以下。
{
  "env": {
    "browser": true,
    "commonjs": true,
    "es2021": true
  },
  "extends": ["eslint:recommended", "plugin:@typescript-eslint/recommended"],
  "overrides": [],
  "parser": "@typescript-eslint/parser",
  "parserOptions": {
    "ecmaVersion": "latest",
    "sourceType": "module"
  },
  "plugins": ["@typescript-eslint"],
  "rules": {},
  "root": true
}
npm runコマンドの設定
package.jsonにコンパイルコマンドを設定する。
  "scripts": {
    "dev": "ts-node index.ts",
    "build": "webpack",
    "watch": "webpack -w",
    "serve": "node dist/main.js"
  },
webpack 設定
TypeScript のソースコードはそのまま実行できないため、JavaScript にコンパイルする必要がある。
TypeScript からもtscコマンドが用意されているが、今回はwebpackという、ソースコードを 1 つの JavaScript ファイルにまとめてくれるモジュールを利用する。
$ npm i -D webpack webpack-cli ts-loader基本的に webpack は JavaScript のソースコードをまとめることしかできないが、ローダーと呼ばれる機能を使うと他の言語にも対応できる。今回、ts-loaderを利用することで TypeScript にも対応してくれる。
webpack-config を作成
webpackコマンドにてソースコードをまとめる際の設定を記載する。
module.exports = {
  // モード値を production に設定すると最適化された状態で、
  // development に設定するとソースマップ有効でJSファイルが出力される
  mode: 'development',

  // メインとなるJavaScriptファイル(エントリーポイント)
  entry: './src/index.ts',
  target: 'node',
  module: {
    rules: [
      {
        // 拡張子 .ts の場合
        test: /\.ts$/,
        // TypeScript をコンパイルする
        use: 'ts-loader',
      },
    ],
  },
  // import 文で .ts ファイルを解決するため
  // これを定義しないと import 文で拡張子を書く必要が生まれる。
  // フロントエンドの開発では拡張子を省略することが多いので、
  // 記載したほうがトラブルに巻き込まれにくい。
  resolve: {
    // 拡張子を配列で指定
    extensions: [
      '.ts', '.js',
    ]
  },
};
以下の記載が抜けていたために Node が実行できず、しばらくハマりました。
target: 'node',参考にした資料:最新版 TypeScript+webpack 5 の環境構築まとめ(React, Vue.js, Three.js のサンプル付き) - ICS MEDIA
Express モジュールをインストールする
Node.js には、HTTP を受け付けるサーバを立てるための人気モジュールとしてExpressがある。
Express をインストールする。
$ npm install expressTypeScript で Express を使うためのモジュールをインストールする。
$ npm install @types/express --save-devひとまずビルドできることを確認する
いよいよソースコードを作成する。
$ touch index.tsimport express from "express"; // ES2015形式で記載する
const app = express();
const port = 3000;
console.log("hello");
app.listen(port, () => console.log(`Example app membersening on port ${port}!`));モジュールのインポートには、ES2015形式のimport文を使っている。
ビルド・サーブしてみる。
$ npm run build
$ npm run serve

hello
Example app membersening on port 3000!※コマンドはpackage.jsonで定義したものを利用している。
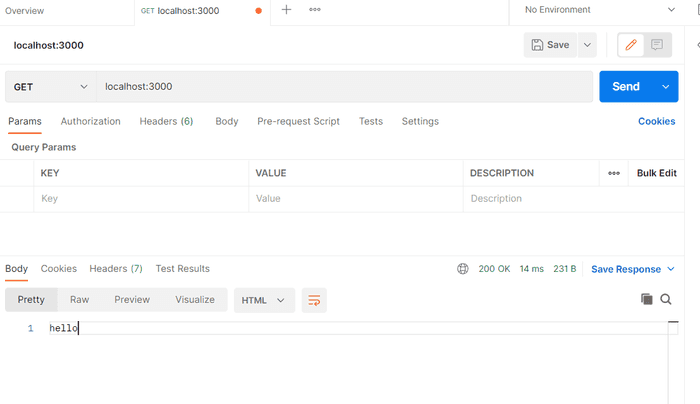
API をたたいてみて応答を確認する。
画像は Postman を利用しているが、GETメソッドであればブラウザでもOK。

オブジェクトを返却する
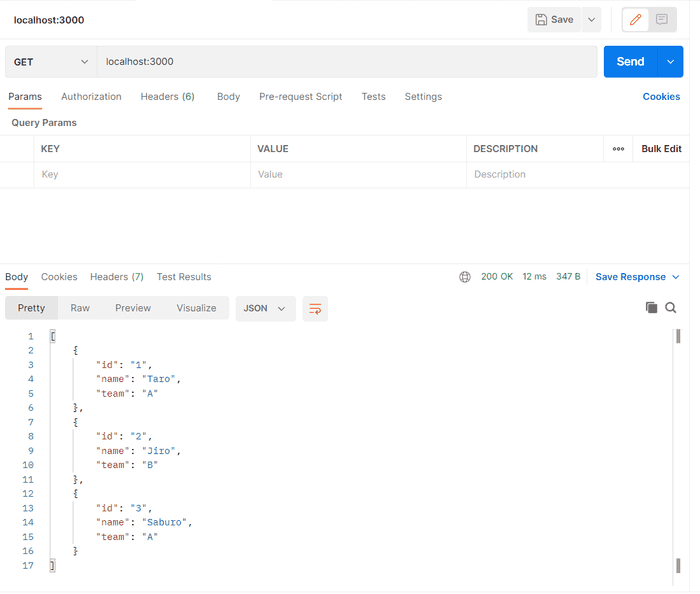
オブジェクトとしてメンバーのリストを返却する API を作成する。
メソッドの使い方は以下の記事を参照。
// const express = require('express')
import express from "express"; // ES5形式で記載する
const app = express();
const port = 3000;

// 簡易的にデータを定義
const members = [{
  id: "1",
  name: "Taro",
  team: "A"
}, {
  id: "2",
  name: "Jiro",
  team: "B"
}, {
  id: "3",
  name: "Saburo",
  team: "A"
}]

// パスパラメータを設定しない場合は全メンバーの情報取得 localhost:3000
app.get('/', (req, res) => {
  res.status(200).send(members)
});

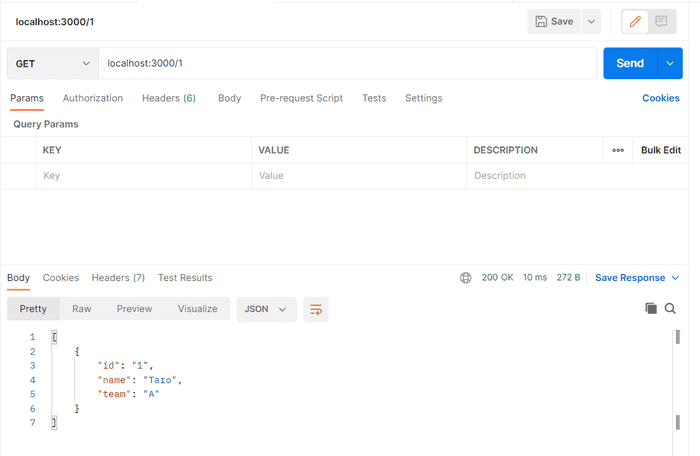
// パスパラメータを設定する場合 例)localhost:3000/1
app.get('/:id', (req, res) => {
  const id = req.params.id;
  const member = members.filter((member)=>member.id===id)
  res.status(200).send(member)
});


app.listen(port, () => console.log(`Example app membersening on port ${port}!`));
ビルド、サーブすると値が返却された。
パスパラメータを入れる場合
おわりに
TypeScriptでプロジェクトを作成して、Node.jsでWebサーバを立ち上げることができた。


